Server
The server is the main component of the web3 proxy. It is responsible for the following:
- Serving the web3 proxy API
- Providing a websocket connection to the client
Running the server
Available flags:
--debug: enable debug logging--port: port to listen on--ipfs: enable IPFS functionality--ipfs-port: port to listen on for IPFS
The server can be run with the following command:
go build && ./server --debug
Lib
The lib folder contains all the client code for the web3 proxy. It is used by the server to communicate with the client.
Examples
Examples are available for all implemented clients. See the subfolder for all examples available for implemented clients.
web3gw_proxy server functionality
Stellar
Creating an account
You can create a stellar account through the rpc createaccount which only requires one argument: the network the account should be created on. It will return the seed in the result.
Take a look at the stellar rpc documentation to see what to send to the server.
Loading your key
Before you can execute any other rpc (except for createaccount) you have to call the load rpc. This will start your session and requires you to specify your secret and the network you want to connect to. If everything went well it will return an empty json rpc 2.0 response.
Take a look at the stellar rpc documentation to see what to send to the server.
Asking your public address
Once your secret key has been loaded you can ask for your public address via the address rpc. This will return the public address in a json rpc 2.0 response.
Take a look at the stellar rpc documentation to see what to send to the server.
Transfer tokens from one account to another
The rpc transfer allows you to transfer tokens from one account to the other. It requires you to provide the amount, the destination account and a memo. This will return the hash of the transaction in a json rpc 2.0 response.
Take a look at the stellar rpc documentation to see what to send to the server.
Swap tokens from one asset to the other
It is possible to swap your lumen tokens to tft and visa versa with the rpc swap. It requires the amount, the source asset and the destination asset. Both the source and destination assets should be one of tft or xlm, meaning we can only swap tfts to lumen and visa versa. This will return the hash of the transaction in a json rpc 2.0 response.
Take a look at the stellar rpc documentation to see what to send to the server.
Get the balance of an account
You can as for the balance of an account with the rpc balance. The account to ask the balance of can be send via the parameters. If it is not present in the parameters the balance will be returned of the account that is currently loaded. The response will contain the balance of the account.
Take a look at the stellar rpc documentation to see what to send to the server.
Bridge stellar tft to ethereum
You can convert your TFTs on stellar to TFTs on ethereum with the call to bridgetoeth. This call will require you to pass the amount of tft to bridge and the account that should receive the tokens. The response of the server will contain the hash of the transaction on the bridge.
Take a look at the stellar rpc documentation to see what to send to the server.
Bridge stellar tft to tfchain
Similarly to bridging to ethereum you can also convert your TFTs on stellar to TFTs on tfchain with the call to bridgetotfchain. You should provide the amount and the destination twin id that will receive the tokens. The response will contain the hash of the transaction on the bridge.
Take a look at the stellar rpc documentation to see what to send to the server.
Waiting for a transaction on the Ethereum bridge
This is a usefull call in case you are bridging from ethereum to stellar (transfering tft from ethereum to stellar). Once the ethereum has been transferred to the bridge it's time to wait until the bridge executes a similar transaction on stellar (so that the stellar account is receiving the tfts send from the ethereum account). This is what the rpc awaittransactiononethbridge does. It requires the memo of the transaction which is predictable when executing the call to bridge the tokens. If the transaction is found within the next 5 minutes it will return an empty result which means it found the transaction.
Take a look at the stellar rpc documentation to see what to send to the server.
Listing transactions
You can get the transactions of an account via the rpc transactions. Just provide the account, the limit, whether or not to include failed transactions, the cursor and the order the transactions should be in. All of these parameters are optional. Leaving the account empty will result in showing the transactions of the account that is loaded. There is a default limit of 10 transactions, the default cursor is the top (latest), by default we do not show failed transactions and the transactions are by default in descending order. The server will return the transactions in a json rpc response. Please look here to see the definition of a transaction.
Take a look at the stellar rpc documentation to see what to send to the server.
Showing the data related to an account
You can get more information about your account (or any other account) through the rpc accountdata. It has only one parameter: the account to get the data for. The account data will be in the result if the account exists. Please take a look here to get the definition of the account data.
Take a look at the stellar rpc documentation to see what to send to the server.
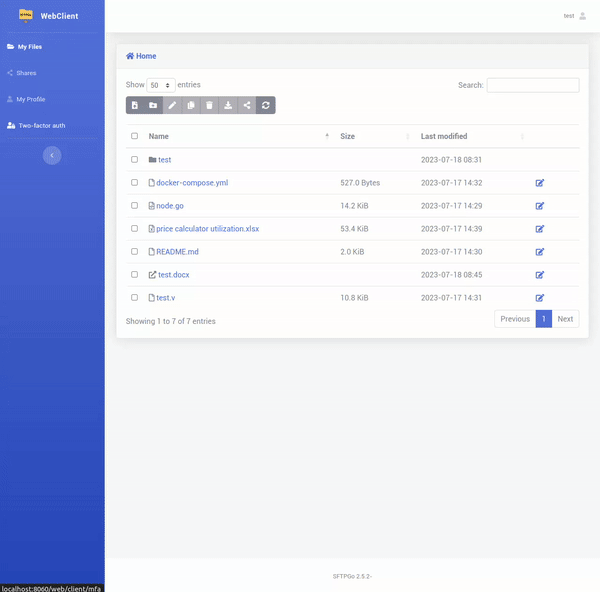
SFTPGO integration
Sftpgo is a SFTP web server with HTTP and webdav support. This server is integrated in web3 proxy, providing a simple to use web client that allows users to manage and share their files.
The integration is done through our own fork of the project found here. This integration build on what is already available and add additional features, the following have been added so far:
- Allowing editing of office documents through the web client via OnlyOffice document server integration
- Adding syntax highlighting in the code editor for Golang, Vlang, Yaml and Markdown.
- Implementing a HTTP client to the SFTPGO API using Vlang
You can start the server by using either one of the following two methods described below:
- Using docker compose(recommended way)
- Enabling SFTPGO in the server binary
Using docker compose
This requires a linux machine as a host.
To have everything up and running, you can use docker-compose to start the necessary comopenents:
- web proxy with sftpgo
- document server
This is done by running:
docker-compose up -d
This creates the admin with the credentials available in the docker compose env file. To configure it, expose the env variables as described above.
Sftpgo server should be accessible through http://localhost:8060/web/admin/login where you will be prompted to login using the admin credentials. Once logged in the admin can now add users to the server and log as one of those users through this link.
Enabling the server
You need to first clone our fork of SFTPGO, since it hosts needed template and static files.
Then you need to have an instance of OnlyOffice Document server running. This can be done using the official docker image:
docker run -i -t -d -p 8016:80 -e JWT_ENABLED=false onlyoffice/documentserver:7.3
In this instance the Document server would be accessible through http://localhost:8016
To start the server you need to pass the following command argument to the web proxy binary, make sure to check docs for how to generate and run the binary:
-sftp-config-dir {sftpgodir}
Where sftpgodir is the directory that will contain the secrets generated by the server during the initial start. Most importantly the directory should include sftpgo.json which configures the server.
There is a config file at the root of the repo that can be used, although it might be necessary to change the following sections:
httpd.templates_path: this should point to the absolute templates path used by SFTPGO to generate the UI. This usually can be found at the root of the sftpgo forkhttpd.static_files_path: this points to the absolute path of additional static files needed for the UI, should also be in the root of the forkdata_provider.name: path for the sqlite DB file that would be created if not already there, requireddata_provider.users_base_dir: absolute path to hold the users data, requiredsmtp.templates_path: this should point to the absolute templates path used by SFTPGO to generate the UI. This usually can be found at the root of the sftpgo fork
In addition to the above configuration the following env variables need to be specified:
SFTPGO_DEFAULT_ADMIN_USERNAME: the admin username for the admin created in initial startupSFTPGO_DEFAULT_ADMIN_PASSWORD: the admin password for the admin created in initial startupSFTP_SERVER_ADDR: The address on which the sftpgo server is reachable to both the user and the OnlyOffice service container, this is needed for the only office document server integration thus the address needs to be exposed to it for example: http://172.17.0.1:8060ONLYOFFICE_SERVER_ADDR: The address for document server address, this is used to import the necessary javascript module to use the document server API and needs to be reachable by the web client for example: http://localhost:8016
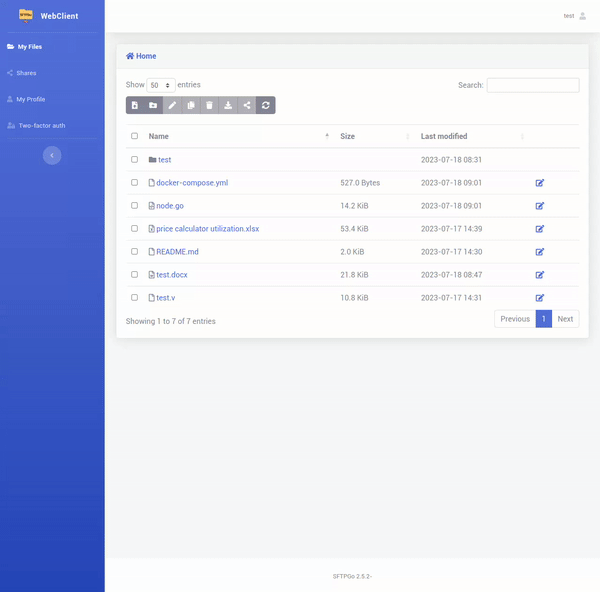
Additional Features
As mentioned above this project is built on what already exists in SFTPGO plus some additional Features. these features are:
Editing Documents via OnlyOffice
The user can now edit documents using OnlyOffice and it supports different document extensions like (.docx, .xlsx, etc...)
To edit a document via only office you simply need to click on the edit icon next to the desired file and that's it.

after that you will be redirected to OnlyOffice and have full access to its functionality.
Code Editor and Syntax Highlighting
Code editing and syntax highlighting was also added for the following languages (Golang, Vlang, Yaml and Markdown) all you have to do is click on the edit icon next to the desired file and you will be redirected to the code editor.
Playground
TODO
RPC methods
You can find OpenRPC descriptions of RPC methods in the playground pages below:
web3 proxy clients for v
RPC websocket client
Most clients listed below need an RPC websocket client to the web3proxy server.
Create an RPC client to a web3proxy server running on localhost:
import freeflowuniverse.crystallib.rpcwebsocket { RpcWsClient }

 ...

 server_address = 'ws://127.0.0.1:8080'
 mut logger := log.Logger(&log.Log{
  level: if debug_log { .debug } else { .info }
 })

 mut rpc_client := rpcwebsocket.new_rpcwsclient(server_address, &logger) or {
  logger.error('Failed creating rpc websocket client: ${err}')
  exit(1)
 }
Clients
v Ethereum client
Create and load a client
Needs an RPC websocket client to a web3proxy server which is assumed to be present in a variable rpc_client.
The url parameter needs the url to an Ethereum full node and the secret parameter a private key in hex format of the Ethereum account the client needs to use.
eth_url := 'ws://185.69.167.224:8546'
secret := '1234567890abcdef1234567890abcdef1234567890abcdef1234567890abcdef'

mut eth_client := eth.new(mut rpc_client)
eth_client.load(url: eth_url, secret: secret)!
Convert TFT on Ethereum to TFT on Stellar
The Ethereum clients provides an easy way to convert TFT on Ethereum to TFT on Stellar using the Stellar-Ethereum bridge.
The amount parameter is a string in decimal format of the number of TFT's to convert. Keep in mind that a conversion fee of 1 TFT will be deducted so make sure the amount is larger than that.
The destination parameter is the Stellar account that will receive the TFT's.
The following snippet will send 49.12 TFT (50.12 - 1 conversion fee) to GBN4RY5FDSY5MJJKD3G4QYXLQ73H6MXYPUXT4YMV3JXWA2HCXAJTFOZ2.
amount := '50.12'
destination := 'GBN4RY5FDSY5MJJKD3G4QYXLQ73H6MXYPUXT4YMV3JXWA2HCXAJTFOZ2'

eth_client.bridge_to_stellar(destination: destination, amount: amount)!
Convert TFT on Stellar to TFT on Ethereum
The conversion from TFT on Stellar to TFT on Ethereum is part of the Stellar client.
Swaps
The web3gw proxy allows buying TFT with and selling TFT for Eth via uniswap.
Eth to TFT
Before you actually swap Eth to TFT you may want to know how much TFT you will get.
The ethereum client allows to get a quote for a swap.
eth_to_swap :='0.01'
tftToReceive := eth_client.quote_eth_for_tft(eth_to_swap)!
Execute the swap.
eth_to_swap :='0.01'
tx := eth_client.swap_eth_for_tft(eth_to_swap)!
TFT to Eth
Before you actually swap TFT to Eth you may want to know how much Eth you will get.
The ethereum client allows to get a quote for a swap.
tft_to_swap := '2000'
eth_to_receive := eth_client.quote_tft_for_eth(tft_to_swap)!
The uniswap contract can not simply take TFT out of your account to perform the swap.
TFT is an ERC-20 token and this provides the ability to approve another account or contract to take a certain amount of TFT from your balance. Every time this other account spends an amount of TFT from your account, this is substracted from the approved amount.
At least the amount of TFT for this swap needs to be approved before the swap can be performed.
t := eth_client.approve_eth_tft_spending(tft_to_swap)!
You can approve a much bigger amount to avoid an approval transaction for every swap, saving gas.
To check how much TFT is still allowed to be swapped, use the get_eth_tft_allowance function.
approved_amount := eth_client.get_eth_tft_allowance()!
Execute the swap.
tx := eth_client.swap_tft_for_eth(tft_to_swap)!
v Stellar client
Any of the calls mentioned below need a RPC websocket client to a web3proxy server which is assumed to be present in a variable rpc_client.
mut stellar_client := stellar.new(mut rpc_client)
Create a stellar account
You can create a stellar account using the create_account method. It takes one argument: the network to create the account on. During the execution of that method the generated key is loaded thus allowing you to call other methodes right after this method without having to load the key first.
seed := stellar_client.create_account("public")
Load a client
If you already possess a stellar account you can just load the key by calling the load method. This requires the secret of your stellar account and optionally the network to connect to (the default network is public).
secret := 'SB1234567890ABCDEFGHIJKLMNOPQRSTUVWXYZ1234567890ABCDEFGH'

mut stellar_client := stellar.new(mut rpc_client)
stellar_client.load(secret: secret, network: 'public')!
Get TFT balance
The balance function gets the TFT balance of an account. If the passed account is an empty string, the balance of the loaded stellar account is returned.
balance := stellar_client.balance('')!
Get data related to an account
The account_data function gets the data related to an account. If the passed account is an empty string, the data related to the loaded stellar account is returned.
account_data := stellar_client.account_data('')!
Transfer TFT from one account to the other on stellar
Calling transfer allows you to transfer tft on stellar from one account to the other.
amount := '1651.12'
destination := 'GBN4RY5FDSY5MJJKD3G4QYXLQ73H6MXYPUXT4YMV3JXWA2HCXAJTFOZ2'
stellar_client.transfer(destination: destination, amount: amount)!
Swap tokens from one asset to the other
If you wish to swap some tokens into another asset, for example from XLM (lumen) to TFT you can do so by calling the swap method.
amount := '500.0'
destination := 'GBN4RY5FDSY5MJJKD3G4QYXLQ73H6MXYPUXT4YMV3JXWA2HCXAJTFOZ2'
stellar_client.swap(amount: amount, source_asset: "xlm", destination_asset: "tft")!
Transactions
Transactions of an account can be returned with the method transactions. Here are the arguments it takes:
account: filter the transactions on the account with the address from this argument, leave empty for your accountlimit: limit the amount of transactions to gather with this argument, this is 10 by defaultinclude_failed: include the failed argumentscursor: list the last transactions starting from this cursor, leave empty to start from the topascending: if true it will list the transactions in ascending order, default is false
amount := '500.0'
myaccount := stellar_client.address()!
transactions := stellar_client.transactions(account:myaccount, limit:20)!
Convert TFT on Stellar to TFT on Ethereum
The stellar client provides an easy way to convert TFT on Stellar to TFT on Ethereum using the Stellar-Ethereum bridge.
The amount parameter is a string in decimal format of the number of TFT's to convert. Keep in mind that a conversion fee of 2000 TFT will be deducted so make sure the amount is larger than that.
The destination parameter is the Ethereum account that will receive the TFT's.
The following snippet will send 1000.50 TFT (3000.50 - 2000 conversion fee) to 0x65e491D7b985f77e60c85105834A0332fF3002CE.
amount := '3000.50'
destination := '0x65e491D7b985f77e60c85105834A0332fF3002CE'
stellar_client.bridge_to_eth(amount: amount, destination: destination)!
The conversion from TFT on Ethereum to TFT on Stellar is part of the Ethereum client.
Convert TFT on Stellar to TFT on Tfchain
The Stellar-Tfchain bridge allows you to convert your TFTs on stellar to TFTs on Tfchain. Calling the method bridge_to_tfchain will initiate that process. It requires the amount and the twin id of the recipient on Tfchain.
Note that the bridge_to_tfchain will return once that the transaction has been executed on Stellar. This does not mean that the amount transferred will be on the Tfchain account right away. The bridge has to recognize the transaction and create a similar transaction on Tfchain. It is therefore encouraged to execute the await_transaction_on_tfchain_bridge method (from Tfchain client) right after the bridge_to_tfchain method. This function returns once it recognizes the transaction with the hash return by bridge_to_tfchain. The example demonstrates the process.
amount := '3000.50'
hash := stellar_client.bridge_to_tfchain(amount: amount, twin_id: 53)!

tfchain_client.await_transaction_on_tfchain_bridge(hash)!
Examples
Before running examples, make sure your server is running and that you are in the correct example folder.
Tfgrid examples
First go to the examples/tfgrid directory:
cd examples/tfgrid
- Machines
- Kubernetes Cluster
- ZDB
- Gateway Name
- Gateway FQDN
- ZOS Node Calls
- Machine With QSFS
- Applications
Machines example
This is a dummy example that executes all operations exposed on grid machines
To run the machines example
-m: mnemonic-n: network (dev, qa, test, main)
v run machines.v -m `mnemonic phrase` -n dev
K8s Example
The k8s example exposes the following functionality:
- deploying a k8s instance with custom specs.
- adding a k8s worker node to a pre-existing cluster.
- removeing a k8s worker node from a pre-existing cluster.
- reading a k8s instance from the grid.
- deleting a k8s instance from the grid.
CLI Arguments
The k8s cli has the following arguments:
- mnemonic: user mnemonic.
- network: chain network to use. defaults to
dev - address: address of web3proxy to connect to. defaults to
ws://127.0.0.1:8080. - operation: this is the operation that you want to perform. must be one of
deploy,add,remove,get, ordelete. - debug: true to print debug logs.
Deploy Operation Arguments
- name: Name of the cluster
- token: Token for the cluster, used to let workers join the cluster. defaults to a random string from 20 english letter characters.
- ssh: public SSH Key to access any cluster node. should be in
~/.ssh/id_rsa.pubon linux systems. - workers: Number of workers to add to the cluster. defaults to
1. - farm_id: Farm id to deploy on, if 0, a random eligible node on a random farm will be selected for each cluster node. defaults to
0. - capacity: capacity of the cluster nodes. must be one of
small,medium,large, orextra-large. defaults tomedium. - public_ip: True to add public ips for each cluster node. defaults to
false
v run k8s.v --network main --mnemonic "YOUR MNEMONIC" --operation deploy --name myk8s --capacity small --ssh "YOUR SSH KEY"
Add Operation Arguments
- name: name of the k8s instance
- farm_id: farm id to deploy on, if 0, a random eligible node on a random farm will be selected. defaults to
0. - capacity: capacity of the k8s instance. must be one of
small,medium,large, orextra-large. defaults tomedium. - public_ip: True to add a public ip for the new worker. defaults to
false.
v run k8s.v --network main --mnemonic "YOUR MNEMONIC" --operation add --name myk8s --public_ip true --capacity small
Remove Operation Arguments
- name: name of the k8s instance
v run k8s.v --network main --mnemonic "YOUR MNEMONIC" --operation remove --name myk8s --worker_name wr123456
Get Operation Arguments
- name: name of the k8s instance
v run k8s.v --network main --mnemonic "YOUR MNEMONIC" --operation get --name myk8s
Delete Operation Arguments
- name: name of the k8s instance
v run k8s.v --network main --mnemonic "YOUR MNEMONIC" --operation delete --name myk8s
zdb Example
The zdb example exposes the following functionality:
- deploying a zdb instance with custom specs.
- reading a zdb instance from the grid.
- deleting a zdb instance from the grid.
CLI Arguments
The zdb cli has the following arguments:
- mnemonic: user mnemonic.
- network: chain network to use. defaults to
dev - address: address of web3proxy to connect to. defaults to
ws://127.0.0.1:8080. - operation: this is the operation that you want to perform. must be one of
deploy,get, ordelete. - debug: true to print debug logs.
Deploy Operation Arguments
- name: identifier for the instance, must be unique
- node_id: node id to deploy on, if 0, a random eligible node will be selected. defaults to
0. - password: zdb password
- public: true to make zdb public
- size: size in GB of the zdb
- mode: mode of the zdb. must be one of
user, orseq. defaults touser
v run zdb.v --network main --mnemonic "YOUR MNEMONIC" --operation deploy --name myzdb --node_id 5 --password mypass123 --size 10
Get Operation Arguments
- name: name of the zdb instance
v run zdb.v --network main --mnemonic "YOUR MNEMONIC" --operation get --name myzdb
Delete Operation Arguments
- name: name of the zdb instance
v run zdb.v --network main --mnemonic "YOUR MNEMONIC" --operation delete --name myzdb
Gateway name Example
The gateway name example exposes the following functionality:
- deploying a gateway name instance with custom specs.
- reading a gateway name instance from the grid.
- deleting a gateway name instance from the grid.
CLI Arguments
The gateway name cli has the following arguments:
- mnemonic: user mnemonic.
- network: chain network to use. defaults to
dev - address: address of web3proxy to connect to. defaults to
ws://127.0.0.1:8080. - operation: this is the operation that you want to perform. must be one of
deploy,get, ordelete. - debug: true to print debug logs.
Deploy Operation Arguments
- name: identifier for the instance, must be unique
- node_id: node id to deploy on.
- tls_passthrough: if false will terminate the certificates on the gateway, else will passthrough the request as is.
- backend: backend of the gateway
v run gateway_name.v --network main --mnemonic "YOUR MNEMONIC" --operation deploy --name mygateway_name --node_id 1 --backend http://1.1.1.1:9000
Get Operation Arguments
- name: name of the gateway_name instance
v run gateway_name.v --network main --mnemonic "YOUR MNEMONIC" --operation get --name mygateway_name
Delete Operation Arguments
- name: name of the gateway_name instance
v run gateway_name.v --network main --mnemonic "YOUR MNEMONIC" --operation delete --name mygateway_name
Gateway FQDN Example
The gateway fqdn example exposes the following functionality:
- deploying a gateway fqdn instance with custom specs.
- reading a gateway fqdn instance from the grid.
- deleting a gateway fqdn instance from the grid.
CLI Arguments
The gateway fqdn cli has the following arguments:
- mnemonic: user mnemonic.
- network: chain network to use. defaults to
dev - address: address of web3proxy to connect to. defaults to
ws://127.0.0.1:8080. - operation: this is the operation that you want to perform. must be one of
deploy,get, ordelete. - debug: true to print debug logs.
Deploy Operation Arguments
- name: identifier for the instance, must be unique
- node_id: node id to deploy on.
- tls_passthrough: if false will terminate the certificates on the gateway, else will passthrough the request as is.
- backend: backend of the gateway
- fqdn: FQDN of the gateway
v run gateway_fqdn.v --network main --mnemonic "YOUR MNEMONIC" --operation deploy --name mygateway_fqdn --node_id 1 --backend http://1.1.1.1:9000 --fqdn mydomain.com
Get Operation Arguments
- name: name of the gateway_fqdn instance
v run gateway_fqdn.v --network main --mnemonic "YOUR MNEMONIC" --operation get --name mygateway_fqdn
Delete Operation Arguments
- name: name of the gateway_fqdn instance
v run gateway_fqdn.v --network main --mnemonic "YOUR MNEMONIC" --operation delete --name mygateway_fqdn
ZOS Node Calls example
This is a dummy example that executes all operations exposed for ZOS node calls
To run the ZOS calls example
-m: mnemonic-n: network (dev, qa, test, main)
v run zos_calls.v -m `mnemonic phrase` -n dev
Machine with QSFS example
This is a dummy example that executes all operations exposed on a Machine with QSFS
To run the Machine with QSFS example
-m: mnemonic-n: network (dev, qa, test, main)
v run machine_with_qsfs.v -m `mnemonic phrase` -n dev
Tfgrid appplication examples
Discourse Example
The discourse example exposes the following functionality:
- deploying a discourse instance with custom specs.
- reading a discourse instance from the grid.
- deleting a discourse instance from the grid.
CLI Arguments
The discourse cli has the following arguments:
- mnemonic: user mnemonic.
- network: chain network to use. defaults to
dev - address: address of web3proxy to connect to. defaults to
ws://127.0.0.1:8080. - operation: this is the operation that you want to perform. must be one of
deploy,get, ordelete. - debug: true to print debug logs.
Deploy Operation Arguments
- name: Name of the discourse instance
- farm_id: Farm ID to deploy the instance on. If 0, a random eligible node on a random farm will be selected. defaults to
0. - capacity: Capacity of the discourse instance. must be one of
small,medium,large, orextra-large. defaults tomedium. - disk: Size in GB of disk to be mounted. defaults to
0 - ssh: public SSH key to access the Presearch machine. should be in
~/.ssh/id_rsa.pubon linux systems. - dev_email: Developer email
- smtp_address: SMTP server domain address.
- smtp_username: SMTP username
- smtp_password: SMTP password
- smtp_enable_tls: True to enable TLS for SMTP. defaults to
false - smtp_port: SMTP server port, defaults to
587 - public_ipv6: Add public ipv6 to the instance. defaults to
false
v run discourse.v --network main --mnemonic "YOUR MNEMONIC" --operation deploy --name mydiscourse --capacity large --ssh "YOUR PUBLIC SSH KEY"
Get Operation Arguments
- name: name of the discourse instance
v run discourse.v --network main --mnemonic "YOUR MNEMONIC" --operation get --name mydiscourse
Delete Operation Arguments
- name: name of the discourse instance
v run discourse.v --network main --mnemonic "YOUR MNEMONIC" --operation delete --name mydiscourse
Funkwhale Example
The funkwhale example exposes the following functionality:
- deploying a funkwhale instance with custom specs.
- reading a funkwhale instance from the grid.
- deleting a funkwhale instance from the grid.
CLI Arguments
The funkwhale cli has the following arguments:
- mnemonic: user mnemonic.
- network: chain network to use. defaults to
dev - address: address of web3proxy to connect to. defaults to
ws://127.0.0.1:8080. - operation: this is the operation that you want to perform. must be one of
deploy,get, ordelete. - debug: true to print debug logs.
Deploy Operation Arguments
- name: identifier for the instance, must be unique
- farm_id: farm id to deploy on, if 0, a random eligible node on a random farm will be selected. defaults to
0. - capacity: capacity of the funkwhale instance. must be one of
small,medium,large, orextra-large. defaults tomedium. - ssh: public SSH key to access the Funkwhale machine. should be in
~/.ssh/id_rsa.pubon linux systems. - admin_email: admin email to access admin dashboard
- admin_username: admin username to access admin dashboard
- admin_password: admin password to access admin dashboard
- public_ipv6: add public ipv6 to the instance. defaults to
false
v run funkwhale.v --network main --mnemonic "YOUR MNEMONIC" --operation deploy --name myfunkwhale --capacity small --ssh "YOUR PUBLIC SSH KEY" --admin_email e@email.com --admin_username user1 --admin_password pass1
Get Operation Arguments
- name: name of the funkwhale instance
v run funkwhale.v --network main --mnemonic "YOUR MNEMONIC" --operation get --name myfunkwhale
Delete Operation Arguments
- name: name of the funkwhale instance
v run funkwhale.v --network main --mnemonic "YOUR MNEMONIC" --operation delete --name myfunkwhale
Peertube Example
The peertube example exposes the following functionality:
- deploying a peertube instance with custom specs.
- reading a peertube instance from the grid.
- deleting a peertube instance from the grid.
CLI Arguments
The peertube cli has the following arguments:
- mnemonic: user mnemonic.
- network: chain network to use. defaults to
dev - address: address of web3proxy to connect to. defaults to
ws://127.0.0.1:8080. - operation: this is the operation that you want to perform. must be one of
deploy,get, ordelete. - debug: true to print debug logs.
Deploy Operation Arguments
- name: identifier for the instance, must be unique
- farm_id: farm id to deploy on, if 0, a random eligible node on a random farm will be selected. defaults to
0. - capacity: capacity of the peertube instance. must be one of
small,medium,large, orextra-large. defaults tomedium. - ssh: public SSH key to access the Peertube machine. should be in
~/.ssh/id_rsa.pubon linux systems. - admin_email: admin email
- db_username: db username
- db_password: db password
v run peertube.v --network main --mnemonic "YOUR MNEMONIC" --operation deploy --name mypeertube --capacity small --ssh "YOUR PUBLIC SSH KEY"
Get Operation Arguments
- name: name of the peertube instance
v run peertube.v --network main --mnemonic "YOUR MNEMONIC" --operation get --name mypeertube
Delete Operation Arguments
- name: name of the peertube instance
v run peertube.v --network main --mnemonic "YOUR MNEMONIC" --operation delete --name mypeertube
Presearch Example
The presearch example exposes the following functionality:
- deploying a presearch instance with custom specs.
- reading a presearch instance from the grid.
- deleting a presearch instance from the grid.
CLI Arguments
The presearch cli has the following arguments:
- mnemonic: user mnemonic.
- network: chain network to use. defaults to
dev - address: address of web3proxy to connect to. defaults to
ws://127.0.0.1:8080. - operation: this is the operation that you want to perform. must be one of
deploy,get, ordelete. - debug: true to print debug logs.
Deploy Operation Arguments
- name: identifier for the instance, must be unique
- farm_id: farm id to deploy on, if 0, a random eligible node on a random farm will be selected. defaults to
0. - ssh: public SSH key to access the Presearch machine. should be in
~/.ssh/id_rsa.pubon linux systems. - disk_size: size of disk mounted on the presearch instance
- public_ipv4: true to add public ipv4 to presearch instance
- registration_code: You need to sign up on Presearch in order to get your Presearch Registration Code.
- public_restore_key: presearch public key for restoring old nodes
- private_restore_key: presearch private key for restoring old nodes
v run presearch.v --network main --mnemonic "YOUR MNEMONIC" --operation deploy --name mypresearch --ssh "YOUR PUBLIC SSH KEY" --registration_code "YOUR REGISTRATION CODE"
Get Operation Arguments
- name: name of the presearch instance
v run presearch.v --network main --mnemonic "YOUR MNEMONIC" --operation get --name mypresearch
Delete Operation Arguments
- name: name of the presearch instance
v run presearch.v --network main --mnemonic "YOUR MNEMONIC" --operation delete --name mypresearch
Taiga Example
The taiga example exposes the following functionality:
- deploying a taiga instance with custom specs.
- reading a taiga instance from the grid.
- deleting a taiga instance from the grid.
CLI Arguments
The taiga cli has the following arguments:
- mnemonic: user mnemonic.
- network: chain network to use. defaults to
dev - address: address of web3proxy to connect to. defaults to
ws://127.0.0.1:8080. - operation: this is the operation that you want to perform. must be one of
deploy,get, ordelete. - debug: true to print debug logs.
Deploy Operation Arguments
- name: identifier for the instance, must be unique
- farm_id: farm id to deploy on, if 0, a random eligible node on a random farm will be selected. defaults to
0. - capacity: capacity of the taiga instance. must be one of
small,medium,large, orextra-large. defaults tomedium. - ssh: public SSH key to access the Taiga machine. should be in
~/.ssh/id_rsa.pubon linux systems. - admin_username: admin username
- admin_password: admin password
- admin_email: admin email
v run taiga.v --network main --mnemonic "YOUR MNEMONIC" --operation deploy --name mytaiga --capacity small --ssh "YOUR PUBLIC SSH KEY"
Get Operation Arguments
- name: name of the taiga instance
v run taiga.v --network main --mnemonic "YOUR MNEMONIC" --operation get --name mytaiga
Delete Operation Arguments
- name: name of the taiga instance
v run taiga.v --network main --mnemonic "YOUR MNEMONIC" --operation delete --name mytaiga
Ethereum examples
First go to the examples/eth directory:
cd examples/eth
Account examples
Create / load account
-e: ethereum node url
v -cg run create_load_account.v -e https://goerli.infura.io/v3/your_infura_key
Balance of Ethereum account
-s: ethereum secret-e: ethereum node url
v -cg run balance_eth.v -s secret -e https://goerli.infura.io/v3/your_infura_key
Balance of TFT on Ethereum account
-s: ethereum secret-e: ethereum node url
v -cg run balance_tft.v -s secret -e https://goerli.infura.io/v3/your_infura_key
Transfer examples
Prerequisites
- Ethereum account with at least 0.01 ETH
Transfer Ethereum
-s: ethereum secret-d: destination ethereum account-m: amount of eth in string format (can be with decimals: "0.1")-e: ethereum node url
v -cg run transfer_eth.v -m "0.0000001" -d destination_eth -s secret -e https://goerli.infura.io/v3/your_infura_key
Transfer TFT on Ethereum
-s: ethereum secret-d: destination ethereum account-m: amount of tft in string format (can be with decimals: "0.1")-e: ethereum node url
v -cg run transfer_tft.v -m "100.50" -d destination_eth -s secret -e https://goerli.infura.io/v3/your_infura_key
Swap examples
Prerequisites
- Ethereum account with at least 0.01 ETH
Swap Eth to Ethereum TFT
-s: ethereum secret-m: the amount of Eth to swap for TFT (can be with decimals: "0.1")-e: ethereum node url
v -cg run swap_eth_for_tft.v -m "0.00001" -s ethereum_s -e https://goerli.infura.io/v3/your_infura_key
You will get prompted if you are satisfied with the transaction. If you are, type y and hit enter. Otherwise, type n and hit enter.
Swap Ethereum TFT to Eth
-s: ethereum secret-m: amount of tft in string format (can be with decimals: "0.1")-e: ethereum node url
v -cg run swap_tft_for_eth.v -s secret -d destination_stellar_addrr -m "100.50" -e https://goerli.infura.io/v3/your_infura_key
You will get prompted if you are satisfied with the transaction. If you are, type y and hit enter. Otherwise, type n and hit enter.
Bridge examples
Prerequisites
To run this example on Stellar and Ethereum you need:
- Ethereum account with at least 0.01 ETH
- Stellar account with at least 2 XLM and TFT Trustline and TFT tokens
Convert Stellar TFT to Ethereum TFT
-s: stellar secret-d: destination ethereum account-m: amount of tft in string format (can be with decimals: "0.1")-n: network (testnet or public)
v -cg run convert_to_eth.v -m "100.50" -d destination_eth -n testnet -s stellar_s
Convert Ethereum TFT to Stellar TFT
-s: ethereum secret-d: destination stellar account-m: amount of tft in string format (can be with decimals: "0.1")-e: ethereum node url
v -cg run convert_to_stellar.v -s secret -d destination_stellar_addrr -m "100.50" -e https://goerli.infura.io/v3/your_infura_key
Nostr examples
First go to the examples/nostr directory:
cd examples/nostr
Publish and subscribe to messages example
To run the pubsub example
(secret is optional)
v -cg run pubsub.v -s b4fc308f04cb3dc80c2caf18dadc42ba4a7dbdbc1471a2e40fa091ac0e96d711
Chat example
To run the chat example, open 2 terminal windows. In one window run the consumer (this will start streaming for direct messages on a nostr relay):
Use following secret (b4fc308f04cb3dc80c2caf18dadc42ba4a7dbdbc1471a2e40fa091ac0e96d711) or generate your own
v -cg run main_nostr_chat_consumer.v -s b4fc308f04cb3dc80c2caf18dadc42ba4a7dbdbc1471a2e40fa091ac0e96d711
In a second pane, run the publisher:
Receiver: (2bd6ab7f8a9c8c1a337611786aa06a8ab9be0a03bd0ab9417d190109be9cc9a7) Secret: (fb2184cac1bfa5694977d289b698afefc1d012d978e72de6b433dba1cd54ec3d)
v -cg run main_nostr_chat_publisher.v -r 2bd6ab7f8a9c8c1a337611786aa06a8ab9be0a03bd0ab9417d190109be9cc9a7 -s fb2184cac1bfa5694977d289b698afefc1d012d978e72de6b433dba1cd54ec3d
You should now see a message in the consumer pane.
Channels Example
The channels example exposes the following functionality:
- Listing all public channels in a relay
- Reading all messages sent to a channel
- Sending a message to a channel, with the ability to mark the message as a reply for another message/user.
- Subscribing to a channel.
- Creating a new channel
CLI Arguments
The channels cli has the following arguments:
- secret: this is your secret for nostr. if none was provided, a new secret will be generated, used, and printed out to terminal.
- realy_url: this is the relay URL to connect to. this defaults to
https://nostr01.grid.tf/ - operation: this is the operation that you want to perform. must be one of
list,read, orsend.
List Operation Arguments
There are no extra arguments for the list operation.
v run channels.v -s "YOUR SECRET" -o list
Read Operation Arguments
- channel: this is the Channel ID to read messages from. a Channel ID is the event ID of the channel creation event.
v run channels.v -s "YOUR SECRET" -o read "CHANNEL ID"
Send Operation Arguments
- channel: this is the Channel ID to send the message to. a Channel ID is the event ID of the channel creation event.
- content: this is the content of the message.
- reply_to: this is the message ID to reply to, if any.
- public_key_author: this is the public key of the author of the message that you want to reply to, if any.
v run channels.v -s "YOUR SECRET" -o send "CHANNEL ID" "Message content" -reply_to "MESSAGE ID TO REPLY TO"
Subscribe Operation Arguments
- channel_id: this is the Channel ID to subscribe to. a Channel ID is the event ID of the channel creation event.
v run channels.v -s "YOUR SECRET" -o subscribe "CHANNEL ID"
Create Operation Arguments
- name: New channel name.
- description: Channel description.
- picture: Picture URL for the channel.
v run channels.v -s "YOUR SECRET" -o create my_new_channel_name -d "my channel description" -p "https://www.my_channel_picture_url.com
Stellar examples
First go to the examples/stellar directory:
cd examples/stellar
Balance example
Prerequisites
- Stellar account with at least 2 XLM and TFT Trustline and TFT tokens
run the balance example
-s: stellar secret-d: account to get the balance for if not the one from the secret (optional)-n: network (testnet/public, default=public)
v -cg run balance.v -s stellar_secret -n testnet
Send TFT example
Prerequisites
- 2 Stellar accounts with at least 2 XLM and TFT Trustlines.
- The sending account needs TFT tokens
run the example
-s: stellar secret of the sending account-d: destination account-m: amount of TFT in string format (can be with decimals: "0.1")-n: network (testnet/public, default=public)
v -cg run send.v -s stellar_secret -d destination -m amount -n testnet
IPFS examples
First go to the examples/ipfs directory:
cd examples/ipfs
IPFS
Make sure to run the server with --ipfs to enable this functionality.
Run the example like:
v -cg run ipfs.v
Explorer examples
First go to the examples/explorer directory:
cd examples/explorer
Explorer
This example shows how to use the explorer API to get information about a nodes/farms/twins..
To run the explorer example
v -cg run explorer.v
Tfchain examples
First go to the examples/tfchain directory:
cd examples/tfchain
Account examples
Create account
Allows you to create an account on tfchain. The generated mnemonic will be printed out on command line, make sure to save it!
-n: tfchain network
v -cg run create_account.v -n mainnet
Balance of Tfchain account
Prints out the balance for your account on tfchain given the mnemonic and the network.
-m: tfchain mnemonic-n: tfchain network
v -cg run balance.v -m mnemonic -n mainnet
Account information
Shows information related to your account on tfchain (address, balance, twinid, etc.).
-m: tfchain mnemonic-n: tfchain network
v -cg run account_info.v -m mnemonic -n mainnet
Tranfer
Transfer tft from your account to another
-m: tfchain mnemonic-n: tfchain network-a: amount to transfer-d: destination (SS58 address)
v -cg run transfer.v -m mnemonic -n mainnet -a 5000 -d SS58_address
Bridge examples
Prerequisites
To run this example on Stellar and Ethereum you need:
- Tfchain account with at least a couple of TFT
- Stellar account with at least 2 XLM and TFT Trustline and TFT tokens
Convert Stellar TFT to TFChain TFT
-s: stellar secret-n: stellar network (testnet or public)-a: amount to transfer from stellar to tfchain-t: the twinid in tfchain (destination)
v -cg run convert_to_tft.v -s secret -n public -t 1651 -a "100"
Convert TFChain TFT to Stellar TFT
-m: tfchain mnemonic-n: tfchain network-d: stellar address (destination address)-a: amount to transfer from tfchain to stellar
v -cg run convert_to_stellar.v -m mnemonic -d destination_stellar -n mainnet -a "100"
BTC examples
First go to the examples/btc directory:
cd examples/btc
TODO
Metrics
This example shows how to get metrics url for a specific node
To run the metrics example
-t: network, should be dev, test or main-f: farm id-n: node id
v -cg run main_metrics.v -t dev -f 1 -n 11
SFTPGO sal Examples
First go to the examples/sftpgo directory:
cd examples/sftpgo
SFTPGO
JWT Token Generation
This example shows how to run sftpgo sal example to generate jwt token
To run the api key generation example
-a: address, address of sftpgo api like http://localhost:8080/api/v2-u: username to generate jwt for-p: password
v -cg run main_jwt.v -a <ADDRESS> -u <USERNAME> -p <PASSWORD>
SFTPGO
API Key Generation
This example shows how to run sftpgo sal example generate api key
To run the api key generation example
-a: address, address of sftpgo api like http://localhost:8080/api/v2-j: jwt from sftpgo server generate it from http://localhost:8080/api/v2/token-n: key name-c: key description-d: admin username-u: normal user username note: you can not pass -d and -u at the same time, key must relate to a user or admin not both at the same time
v -cg run main_api_key.v -a <ADDRESS> -j <JWT> -n <KEY_NAME> -c <DESCRIPTION> -d <ADMIN>
or
v -cg run main_api_key.v -a <ADDRESS> -j <JWT> -n <KEY_NAME> -c <DESCRIPTION> -u <USER>
SFTPGO
Users
This example shows how to run sftpgo sal example to manage users
To run the users example
-a: address, address of sftpgo api like http://localhost:8080/api/v2-k: API key generated from sftpgo server
v -cg run main_users.v -a <ADDRESS> -K <API_KEY>
SFTPGO
Folders
This example shows how to run sftpgo sal example to manage folders
To run the folders example
-a: address, address of sftpgo api like http://localhost:8080/api/v2-k: API key generated from sftpgo server
v -cg run main_folders.v -a <ADDRESS> -j <API_KEY>
SFTPGO
Roles
This example shows how to run sftpgo sal example to manage roles
To run the roles example
-a: address, address of sftpgo api like http://localhost:8080/api/v2-k: API key generated from sftpgo server
v -cg run main_roles.v -a <ADDRESS> -K <API_KEY>
SFTPGO
Events
This example shows how to run sftpgo sal example to list fs and provider events
To run the events example
-a: address, address of sftpgo api like http://localhost:8080/api/v2-k: API key generated from sftpgo server
v -cg run main_events.v -a <ADDRESS> -k <API_KEY>